my ergonomic keyboard adventure - ergodox ez
After searching for a new keyboard for some while, the ErgoDox EZ caught my attention. It is an open-source, ergonomic, split, mechanical keyboard.
We'll be looking at the hardware itself, getting to know the ErgoDox, setting up a custom firmware, communication between my PC and the EZ, the program controlling lighting (including an live audio spectrum analyzer) and displaying the current words per minute on the screen.
The hardware§
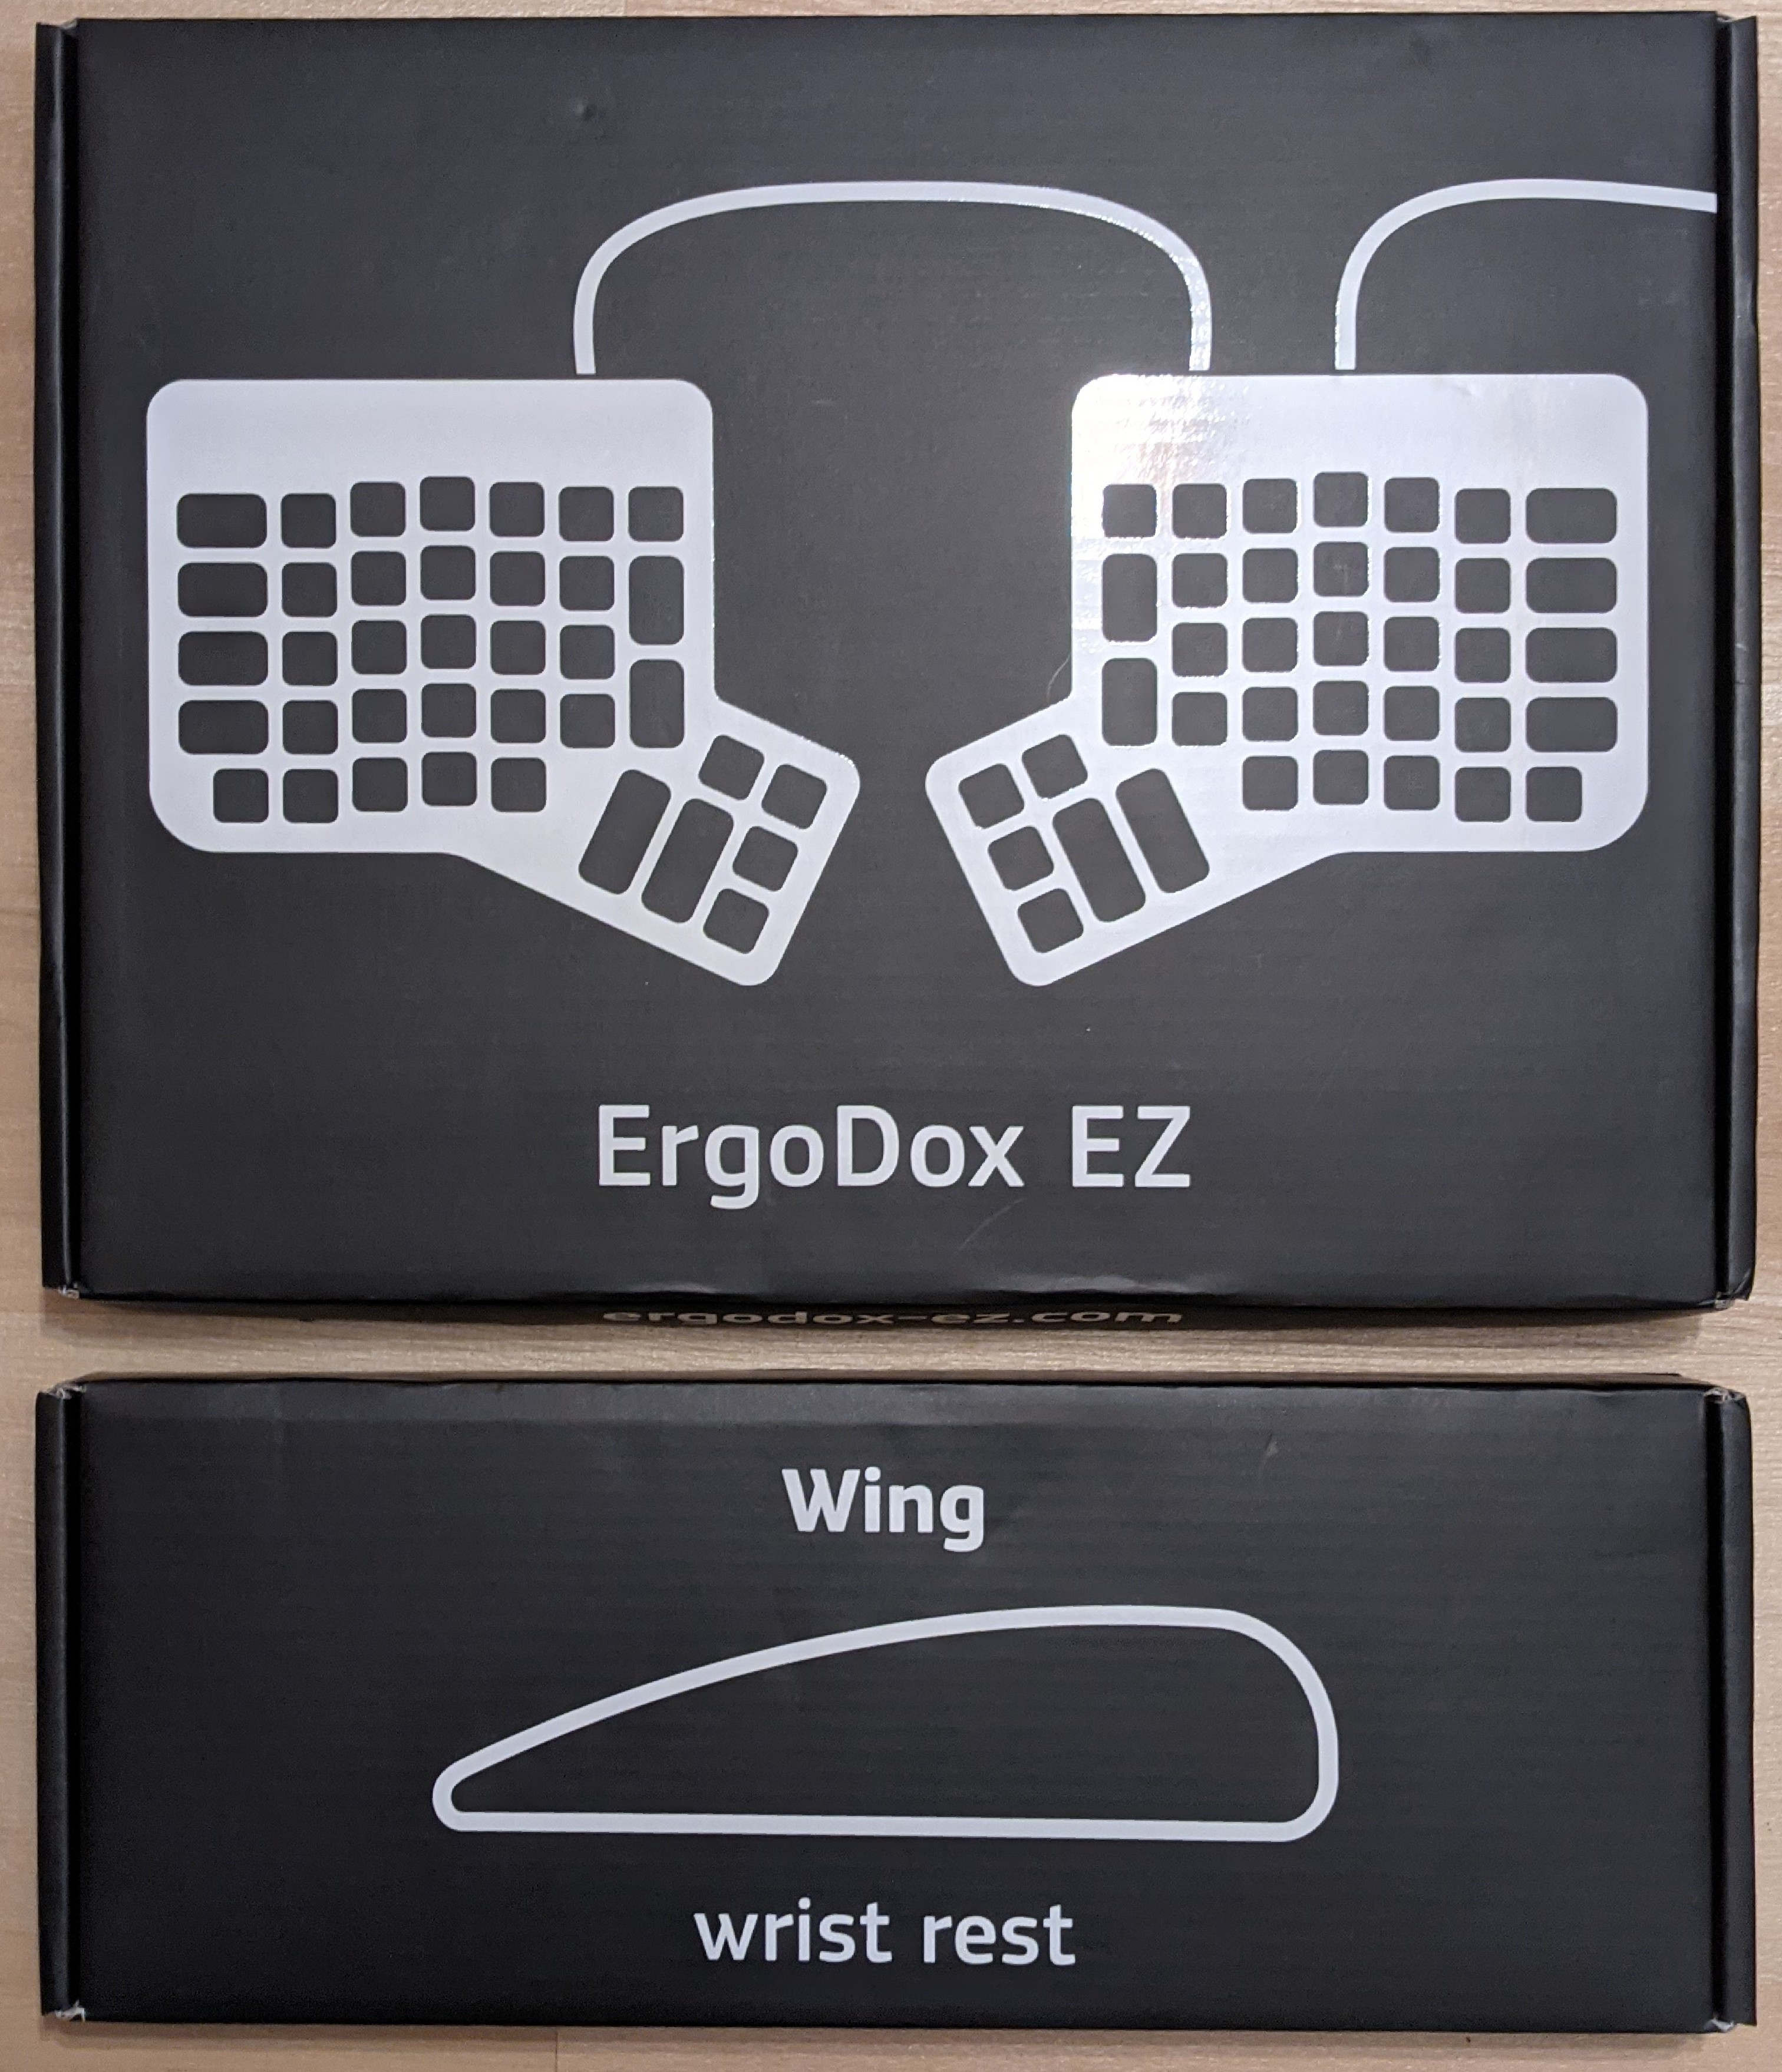
The website configurator gives you quite a few options to personalize various features of your keyboard. I went with the white version, a tilt kit (which lets you adjust the angle of your keyboard), white wrist rests, RGB underglow (called "Shine"), Cherry MX Brown switches and blank keycaps.
The wait began on Monday, April 5th, 2021 when I ordered the keyboard. After which it took just over 2 weeks to get the shipping notification email in my inbox on Tuesday, April 20th. While excitedly refreshing the UPS tracking page more often than was necessary, I got the keyboard in the mail on Thursday, April 22nd.
Small gallery§
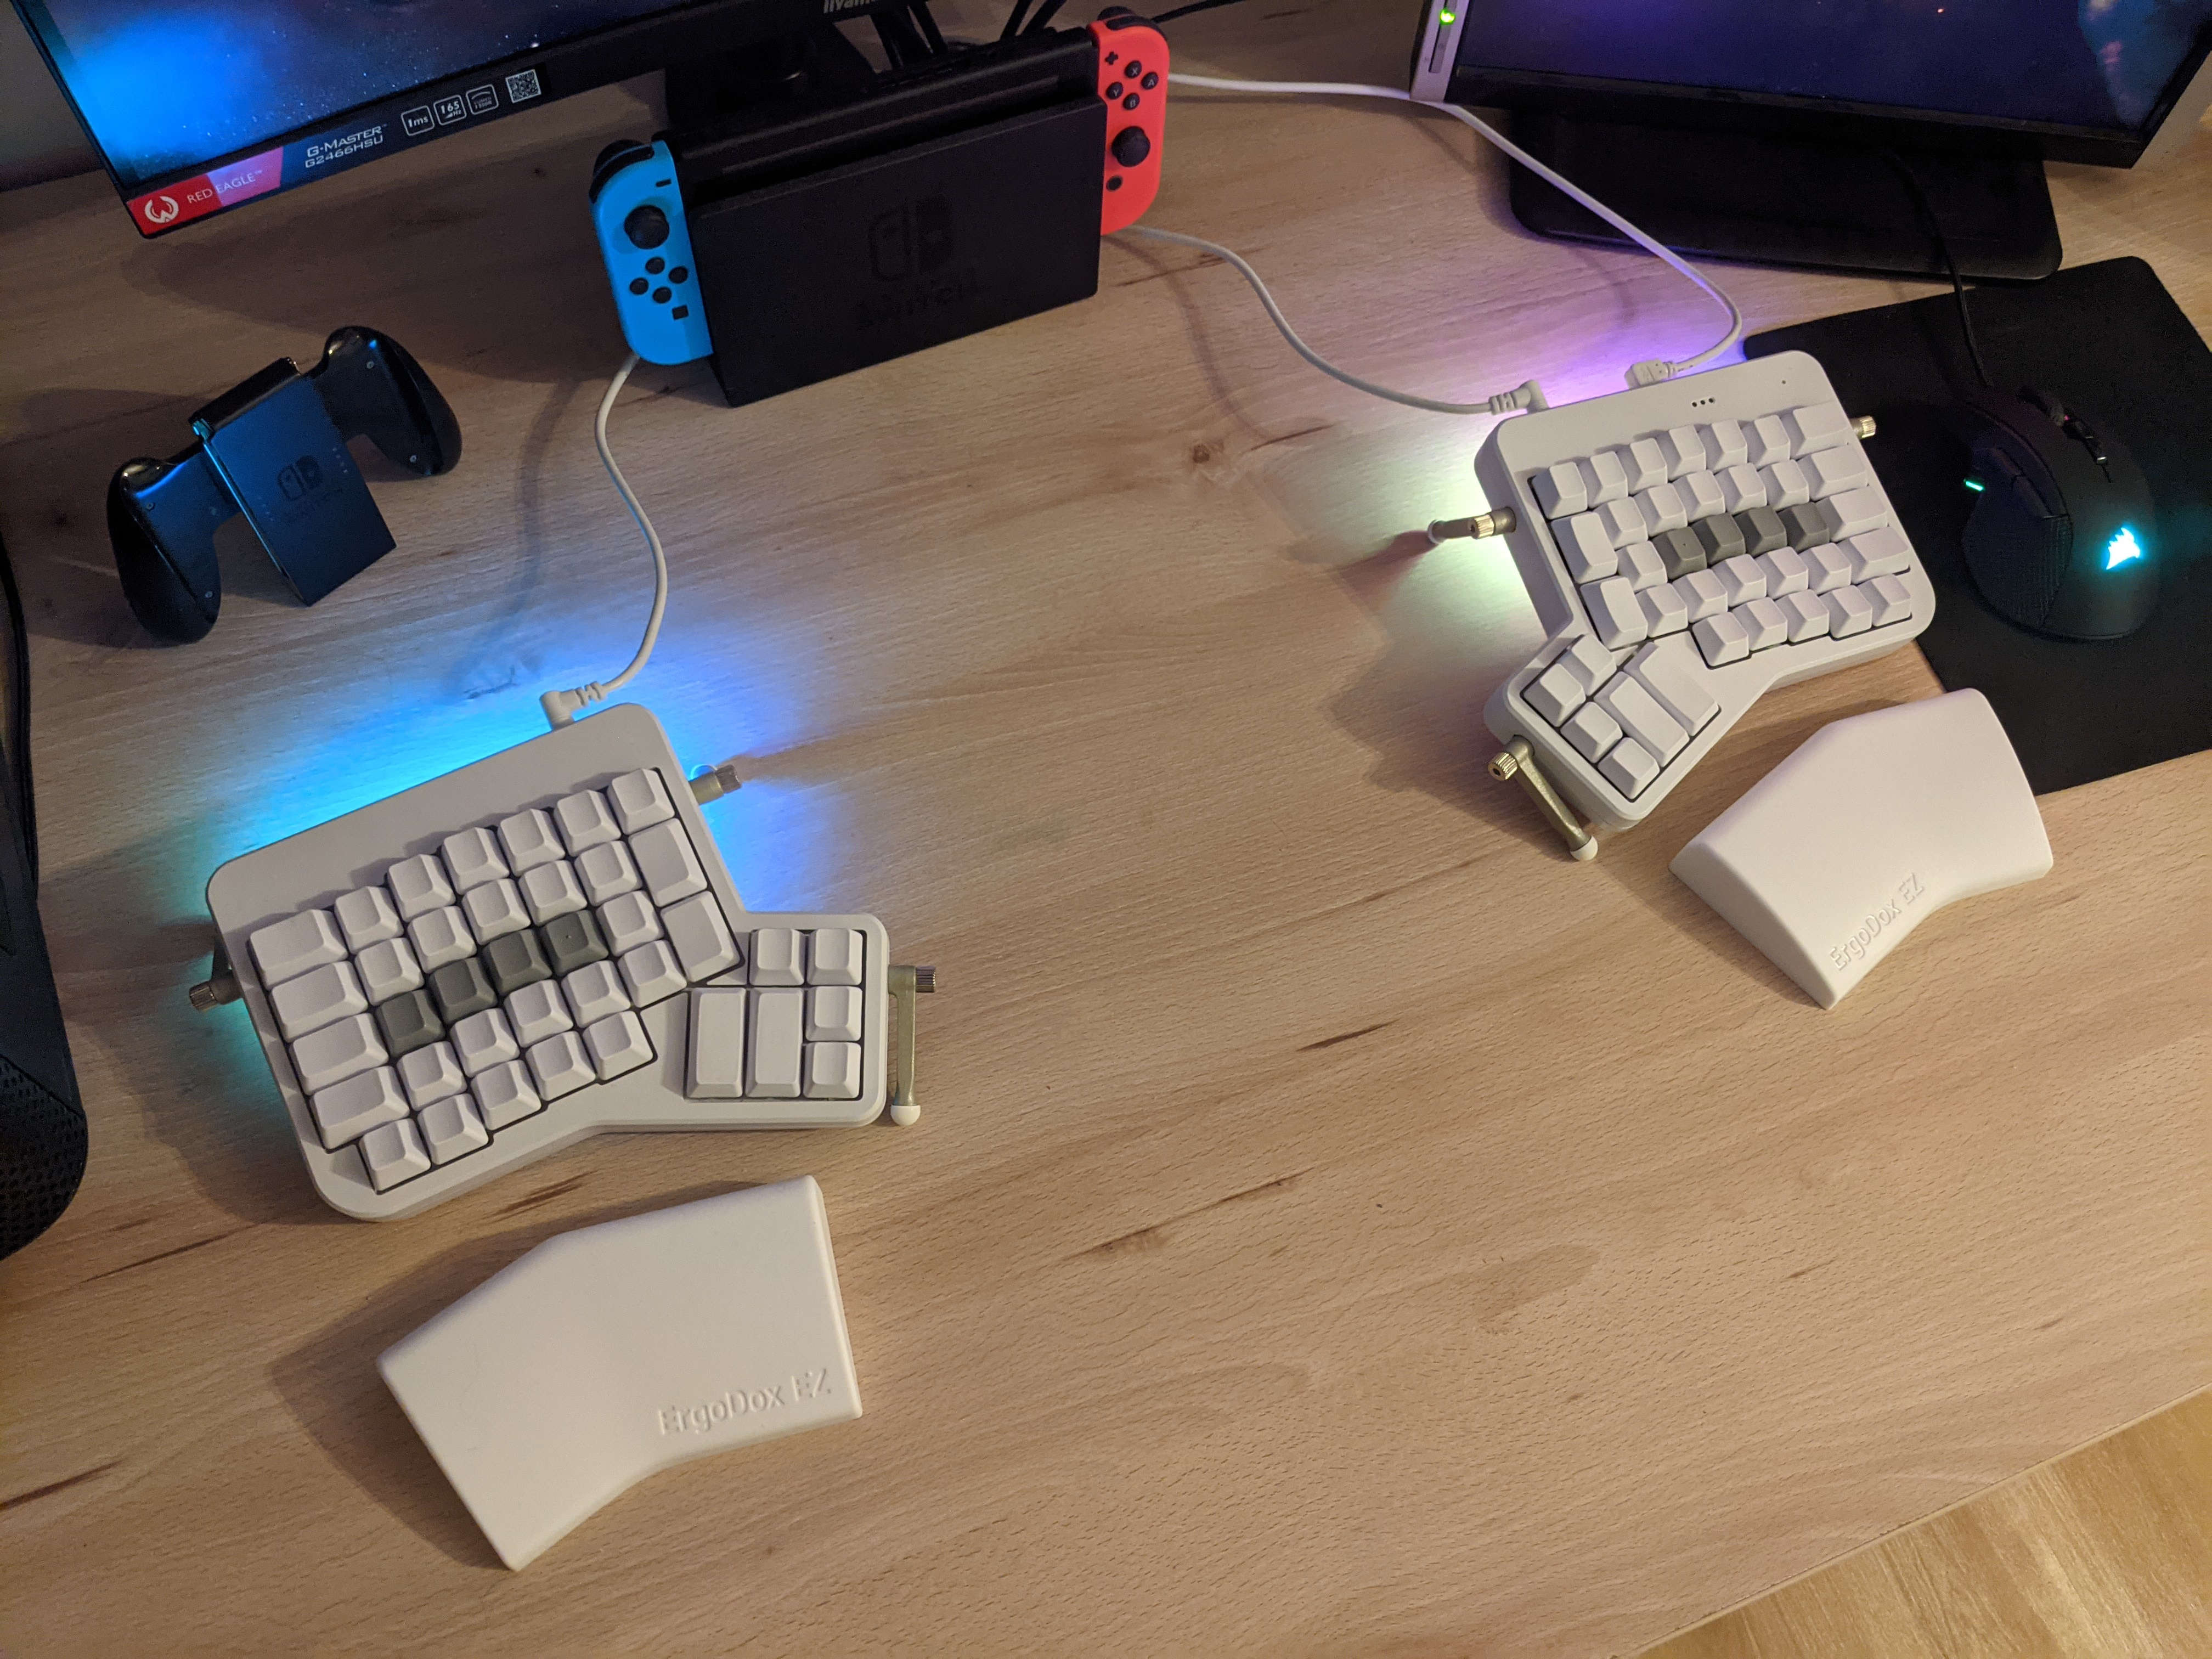
I found the gap in between the two keyboard halves to be an excellent place for the notebook you're scribbling in.
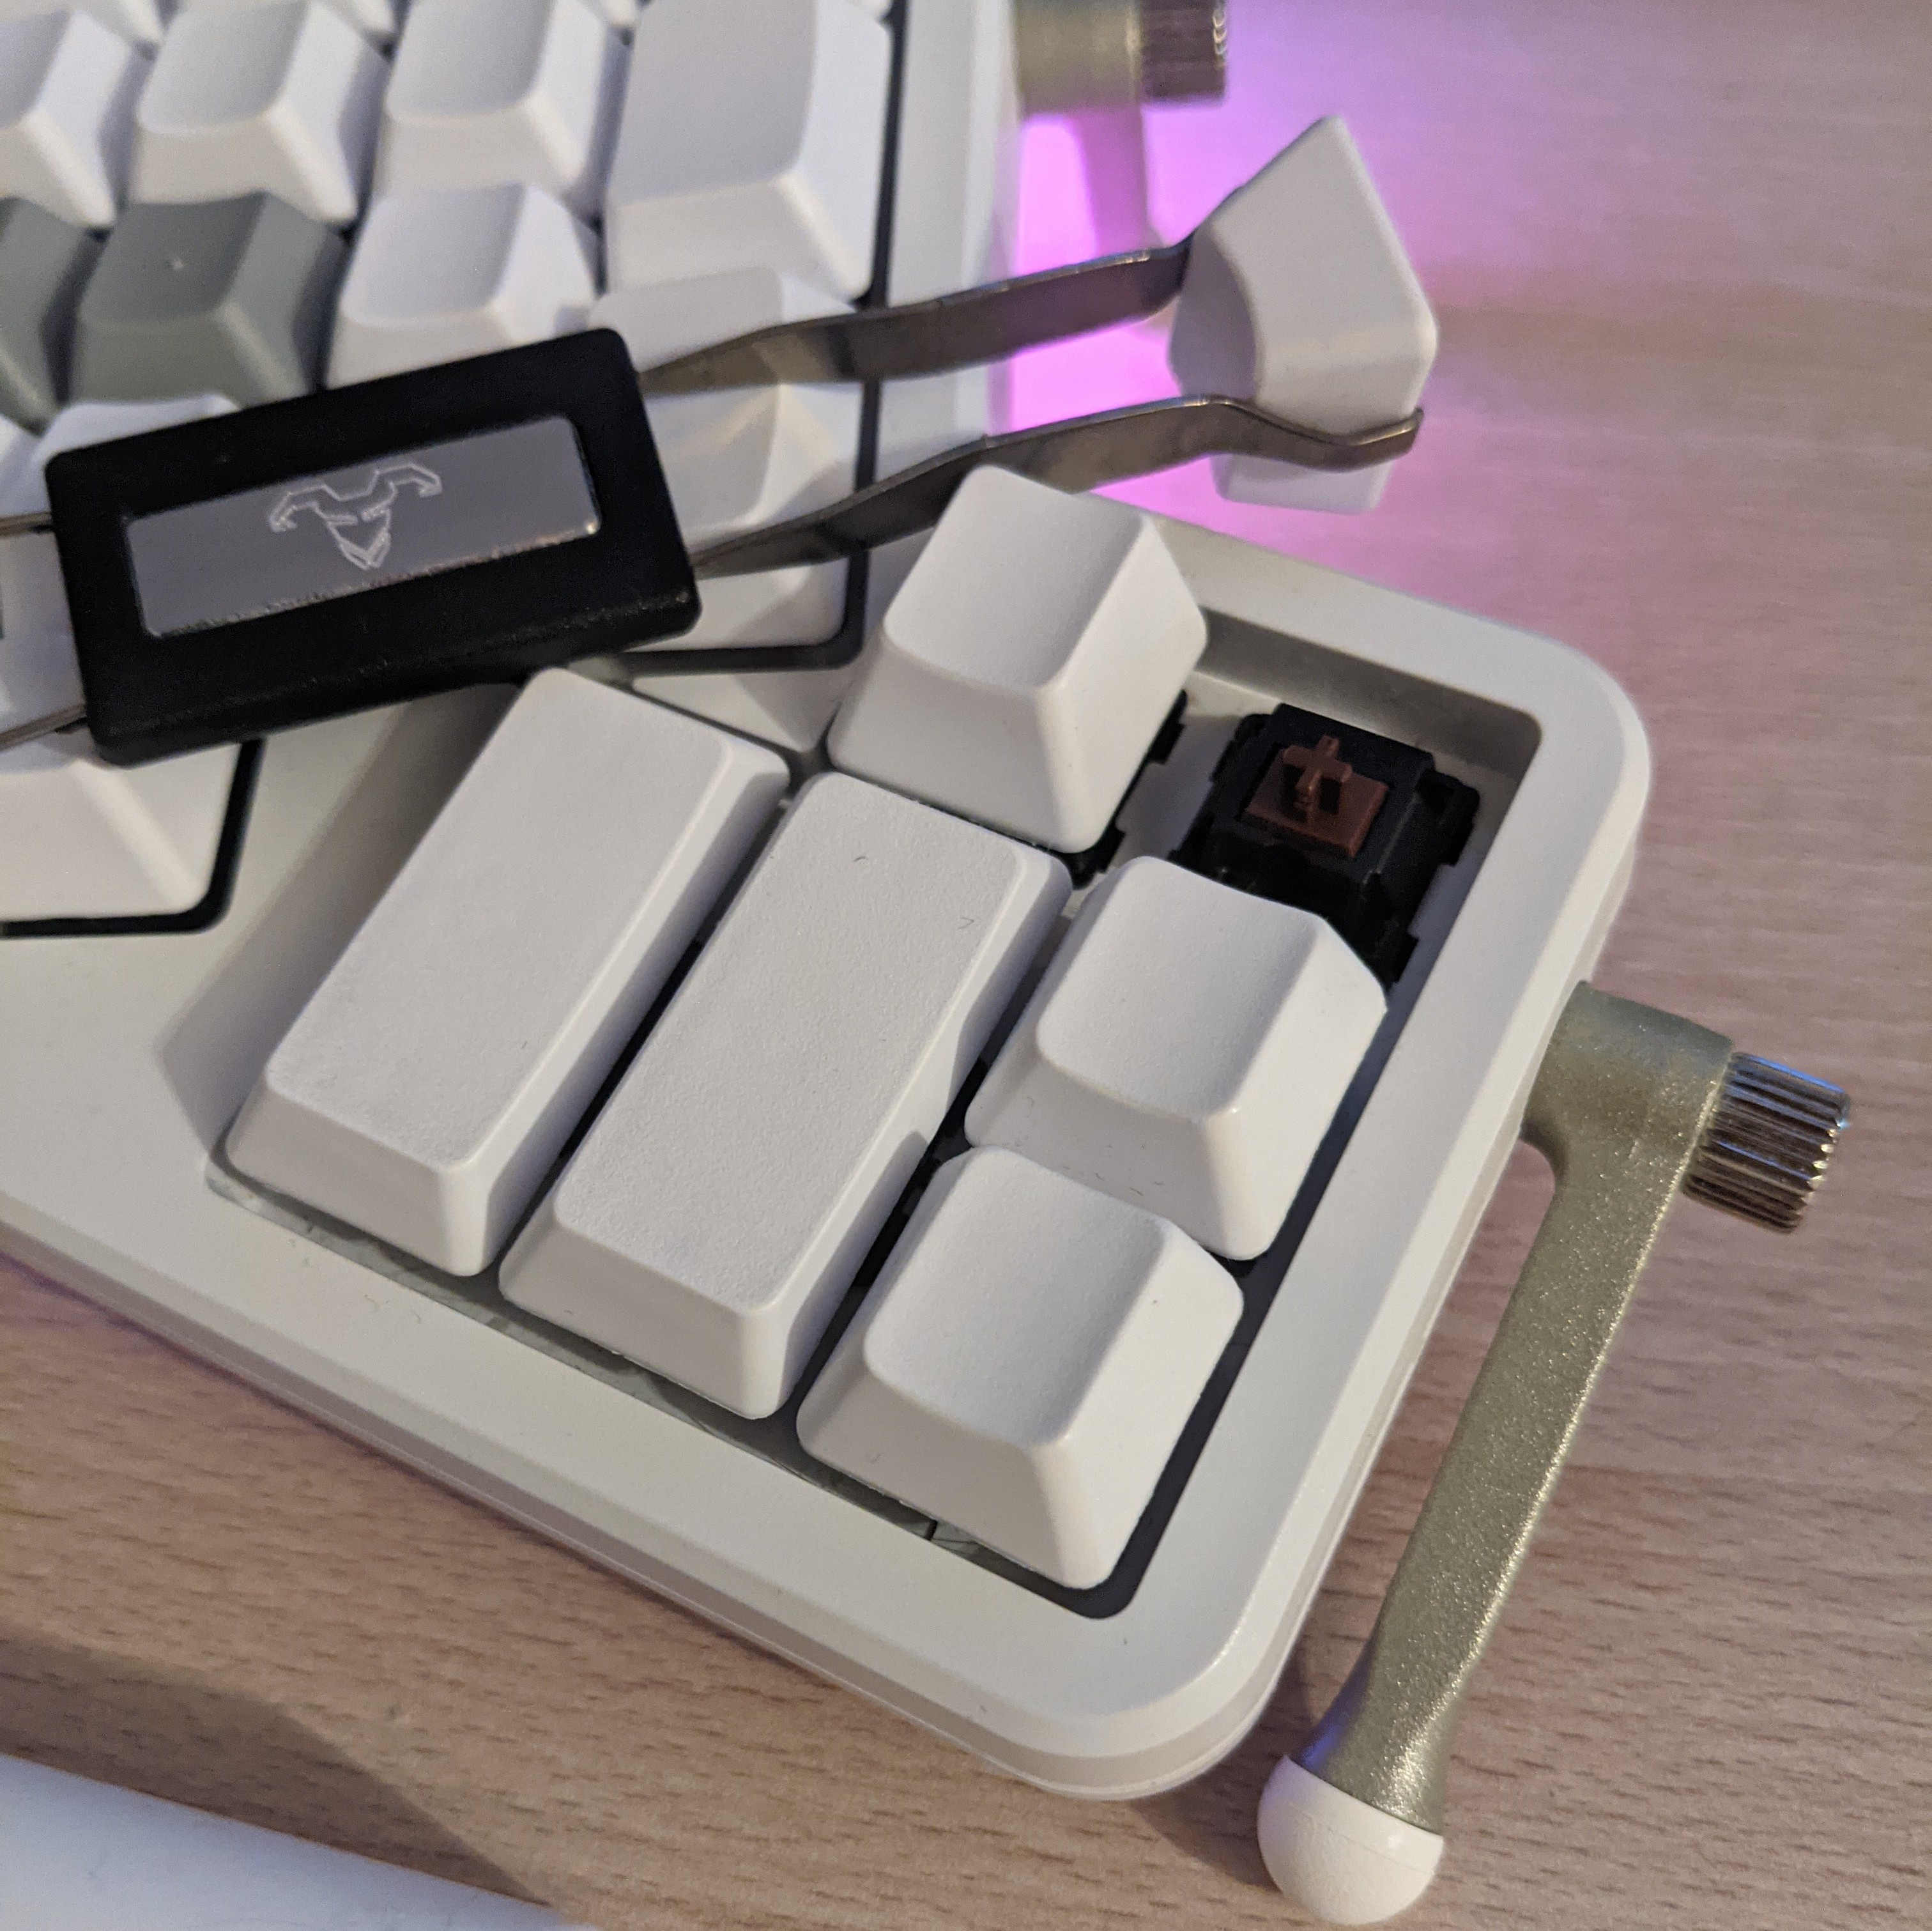
In the picture on the right, I used the wrong side of the puller. Thanks u/GnastyNoodlez for pointing that out. It's staying in the post for fun!
 |  |
|---|
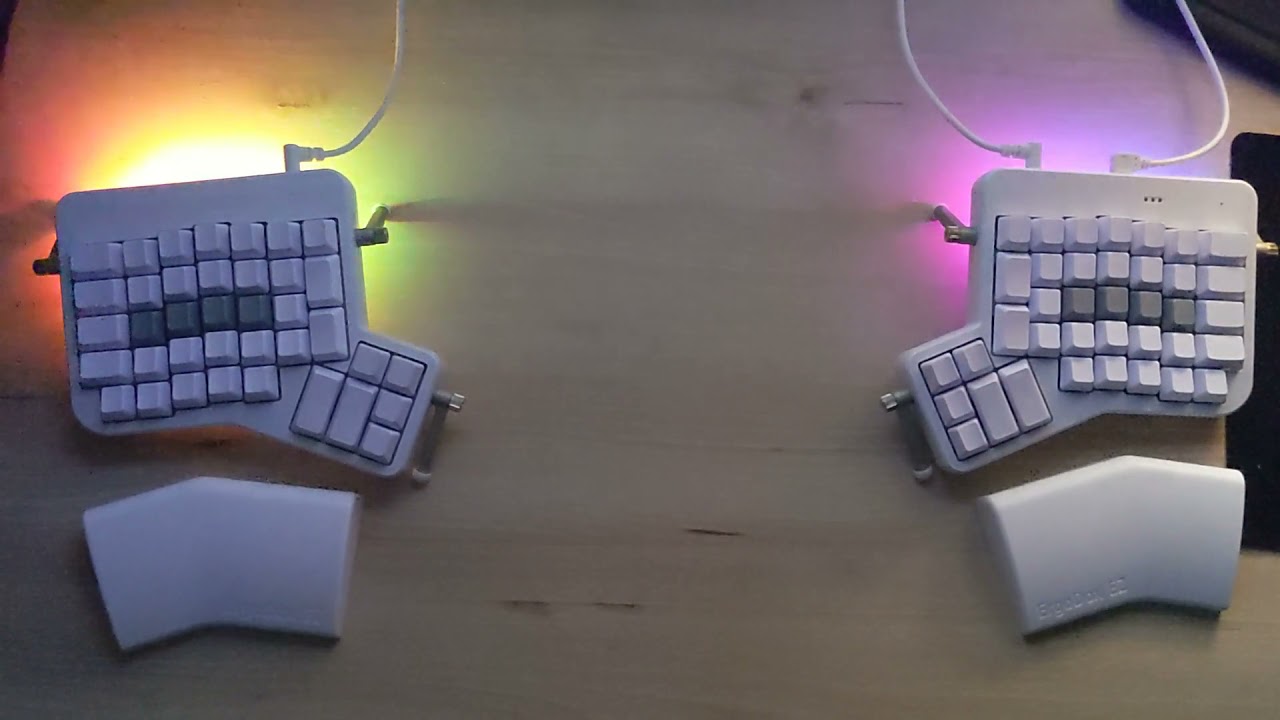
And here's the LED strip on the back of one side. It will see heavy use later.

Counting... 15 LEDs, so in total there are 30.
Learning to type again§
There is probably no better way of showcasing my progress than the WPM graph on monkeytype.com.

Two days after I started using the keyboard, I woke up with the magic ability to type comfortably. This period is represented by the "valley" in this graph.
On a regular keyboard, every row of keys is offset from another. This is what's known as row-stagger and was carried over from the needs of typewriters. The ErgoDox, on the other hand, is column-staggered, which adjusts each column of keys for the different lengths of your individual fingers, improving ergonomics.
When typing characters itself, which is what was measured on monkeytype, this was the biggest hurdle. But what about special characters? Those are placed on an extra layer (which we'll get to now). For these it took around 2 weeks for me to know off the top of my head and somewhat comfortably use.
The layout§
ZSA (the company I bought my ErgoDox from) provides an online configurator called Oryx. Using this tool I went through 28 iterations before ending up on the perfect layout (until now). For the characters themselves, I use Colemak.
Learning Colemak is a one-time investment that will allow you to enjoy faster and pain-free typing for the rest of your life.
Note that this image still shows QWERTY as I apply it through software. This helps with game support.
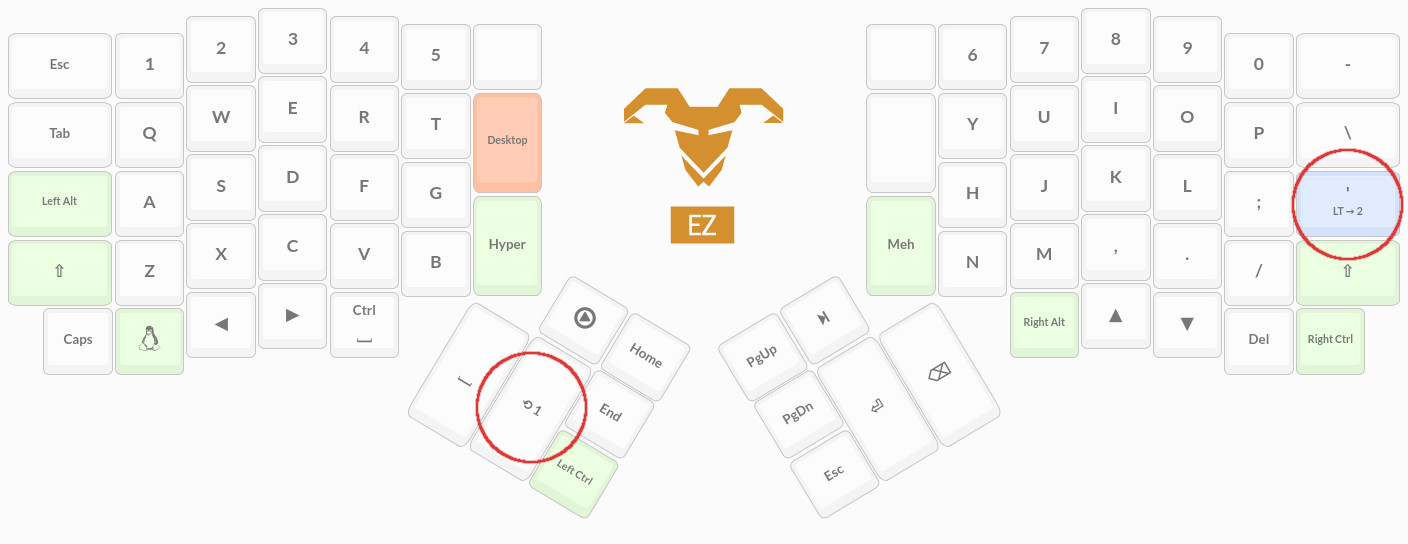
In total, the keyboard features 76 keys. This is not enough for everything you'd want to do (e.g. FN keys). That's the problem layers are here to solve. There are numerous possible ways of switching between them, but I ended up activating a certain layer while a specific key is held down (as marked in the above image). You can take a closer look at my setup yourself in the configurator.
Compiling my own firmware§
Under the hood, Oryx generates and compiles C code, which you then flash onto the microcontroller on your board. But what I wanted to do was take advantage of some extra features of the powerful QMK firmware to my disposal.
The goal of the QMK software project is to develop a completely customizable, powerful, and enjoyable firmware experience for any project - keyboard or otherwise - and to provide helpful, encouraging, and kind support and feedback for people with any software development experience.
There is a button that lets you download the layout's source code. So I installed ZSA's qmk fork on my computer, fed it the layout and, after some time, managed to compile it! Apparently I had really good luck that day, because it worked on the first try upon flashing it 🎉
Here's what the keymap looks like in source-code form.
const uint16_t PROGMEM keymaps[][MATRIX_ROWS][MATRIX_COLS] = {
  [0] = LAYOUT_ergodox_pretty(
    KC_ESCAPE,      KC_1,           KC_2,           KC_3,           KC_4,           KC_5,           KC_TRANSPARENT,                                 KC_TRANSPARENT, KC_6,           KC_7,           KC_8,           KC_9,           KC_0,           KC_MINUS,
    KC_TAB,         KC_Q,           KC_W,           KC_E,           KC_R,           KC_T,           LGUI(KC_D),                                     KC_TRANSPARENT, KC_Y,           KC_U,           KC_I,           KC_O,           KC_P,           KC_BSLASH,
    KC_LALT,        KC_A,           KC_S,           KC_D,           KC_F,           KC_G,                                                                           KC_H,           KC_J,           KC_K,           KC_L,           KC_SCOLON,      LT(2,KC_QUOTE),
    KC_LSHIFT,      KC_Z,           KC_X,           KC_C,           KC_V,           KC_B,           KC_HYPR,                                        KC_MEH,         KC_N,           KC_M,           KC_COMMA,       KC_DOT,         KC_SLASH,       KC_RSHIFT,
    KC_CAPSLOCK,    KC_LGUI,        KC_LEFT,        KC_RIGHT,       LCTL(KC_SPACE),                                                                                                 KC_RALT,        KC_UP,          KC_DOWN,        KC_DELETE,      KC_RCTRL,
                                                                                                    KC_MEDIA_PLAY_PAUSE,KC_HOME,        KC_PGUP,        KC_MEDIA_NEXT_TRACK,
                                                                                                                    KC_END,         KC_PGDOWN,
                                                                                    KC_SPACE,       MO(1),          KC_LCTRL,       KC_ESCAPE,      KC_ENTER,       KC_BSPACE
  ),
  [1] = LAYOUT_ergodox_pretty(
    KC_ESCAPE,      KC_F1,          KC_F2,          KC_F3,          KC_F4,          KC_F5,          KC_TRANSPARENT,                                 KC_TRANSPARENT, KC_F6,          KC_F7,          KC_F8,          KC_F9,          KC_F10,         KC_F11,
    KC_TRANSPARENT, KC_EXLM,        KC_AT,          KC_LCBR,        KC_RCBR,        KC_PIPE,        KC_TRANSPARENT,                                 KC_TRANSPARENT, KC_ASTR,        KC_7,           KC_8,           KC_9,           KC_MINUS,       KC_F12,
    KC_TRANSPARENT, KC_HASH,        KC_DLR,         KC_LPRN,        KC_RPRN,        KC_GRAVE,                                                                       KC_EQUAL,       KC_4,           KC_5,           KC_6,           KC_PLUS,        KC_TRANSPARENT,
    KC_TRANSPARENT, KC_PERC,        KC_CIRC,        KC_LBRACKET,    KC_RBRACKET,    KC_TILD,        KC_TRANSPARENT,                                 KC_TRANSPARENT, KC_AMPR,        KC_1,           KC_2,           KC_3,           KC_BSLASH,      KC_TRANSPARENT,
    KC_TRANSPARENT, KC_EQUAL,       KC_TRANSPARENT, KC_TRANSPARENT, KC_TRANSPARENT,                                                                                                 KC_TRANSPARENT, KC_DOT,         KC_0,           KC_EQUAL,       KC_TRANSPARENT,
                                                                                                    KC_TRANSPARENT, KC_TRANSPARENT, KC_TRANSPARENT, KC_TRANSPARENT,
                                                                                                                    KC_TRANSPARENT, KC_TRANSPARENT,
                                                                                    KC_TRANSPARENT, KC_TRANSPARENT, KC_TRANSPARENT, KC_TRANSPARENT, KC_TRANSPARENT, KC_0
  ),
  [2] = LAYOUT_ergodox_pretty(
    KC_TRANSPARENT, KC_TRANSPARENT, KC_TRANSPARENT, KC_TRANSPARENT, KC_TRANSPARENT, KC_TRANSPARENT, KC_TRANSPARENT,                                 KC_TRANSPARENT, KC_TRANSPARENT, KC_TRANSPARENT, KC_TRANSPARENT, KC_TRANSPARENT, KC_TRANSPARENT, RESET,
    KC_TRANSPARENT, KC_TRANSPARENT, KC_MS_UP,       KC_TRANSPARENT, KC_TRANSPARENT, KC_TRANSPARENT, KC_TRANSPARENT,                                 KC_TRANSPARENT, KC_TRANSPARENT, KC_TRANSPARENT, KC_TRANSPARENT, KC_TRANSPARENT, KC_TRANSPARENT, KC_TRANSPARENT,
    KC_TRANSPARENT, KC_MS_LEFT,     KC_MS_DOWN,     KC_MS_RIGHT,    KC_TRANSPARENT, KC_TRANSPARENT,                                                                 KC_TRANSPARENT, KC_TRANSPARENT, KC_TRANSPARENT, KC_TRANSPARENT, KC_TRANSPARENT, KC_TRANSPARENT,
    KC_TRANSPARENT, KC_TRANSPARENT, KC_TRANSPARENT, KC_TRANSPARENT, KC_TRANSPARENT, KC_TRANSPARENT, KC_TRANSPARENT,                                 KC_TRANSPARENT, KC_TRANSPARENT, KC_TRANSPARENT, KC_TRANSPARENT, KC_TRANSPARENT, KC_TRANSPARENT, KC_TRANSPARENT,
    KC_TRANSPARENT, WEBUSB_PAIR,    KC_TRANSPARENT, KC_TRANSPARENT, KC_MS_BTN3,                                                                                                     KC_AUDIO_VOL_UP,KC_AUDIO_VOL_DOWN,KC_AUDIO_MUTE,  KC_TRANSPARENT, KC_TRANSPARENT,
                                                                                                    KC_TRANSPARENT, KC_TRANSPARENT, KC_TRANSPARENT, KC_TRANSPARENT,
                                                                                                                    KC_TRANSPARENT, KC_TRANSPARENT,
                                                                                    KC_MS_BTN1,     KC_MS_BTN2,     KC_TRANSPARENT, KC_TRANSPARENT, KC_TRANSPARENT, KC_TRANSPARENT
  ),
};
The protocol, raw HID and C implementation§
In order to connect my computer to the code running on my board, I needed a way to live-communicate between the two. This is what's called raw HID.
Raw HID allows for bidirectional communication between QMK and the host computer over an HID interface. This has many potential use cases, such as switching keymaps on the fly or changing RGB LED colors and modes.
On the EZ, the maximum size of such a packet is 32 bytes. In my protocol, the first byte is used to denote the packet ID. Here's an overview of all packets sent from my custom program running on the host computer to QMK.
| ID | Name | Content (arguments -> return) |
|---|---|---|
| 0 | No Op | () -> () |
| 1 | Set full HSV | (h: u8, s: u8, v: u8) -> () |
| 2 | Update Cycle | (cycle: u8, brightnesses: [u8; 30]) -> () |
| 3 | Fetch WPM | () -> (wpm: u8) |
| 4 | Get user config | () -> (mode: u8, brightness: u8) |
| 5 | Set user config | (mode: u8, brightness: u8) -> () |
Okay, that's a lot to take in at once. Let's go through it all.
- Set full HSV: Allows you to set every LED to the same color, specified by HSV (hue, saturation, value/brightness/lightness). This packet is used for the Constant white and Off mode.
- Update Cycle: "Spreads" the color hues over every LED on the keyboard,
producing a rainbow-like pattern, offset by the
cycle. Thebrightnessesarray specifies the brightness for every one of the 30 LEDs. This packet is used for the Spectrum analyzer and Color cycle mode. - Fetch WPM: Uses the WPM calculation feature of QMK to return the current words per minute. This is going to be continuously called and displayed to the user.
- Get/Set user config: Used for storing the program state on the keyboard. Yes, really! The configuration is stored in the board's EEPROM and gets saved after 5 seconds of losing connection to the host program.
Everything described here is implemented in the keymap.c file.
The host program§
I decided to write this in the Rust programming language, as I am very proficient with it and it was the perfect choice for my requirements. Take a look at the source here.
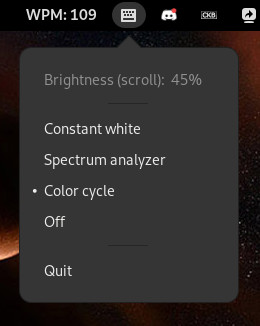
Adjusting the settings is quick using a StatusNotifierItem user interface,
created using the ksni crate. Scroll on the
icon to change the brightness.
WPM display§
First I went the route of generating an icon for each number 0-255 and
displaying that in my existing tray indicator, but that really didn't work out.
So, I went the slightly less hacky way and wrote my first ever GNOME extension:
wpmdisplay. It exposes a DBus method UpdateWPM, taking the current words per
minute as a byte and adding that as an indicator to the GNOME status area. The
code is by far not ideal but... it works! /shrug
Here's the source code.
Modes§
Wait, what exactly are these modes I was talking about? Well, the user will have the choice between several lighting modes. Onto the good stuff!
Constant white§
This displays the color white in the currently specified brightness.

Very cozy~!
Spectrum analyzer§
Probably the coolest of the bunch.
Uses the spectrum-analyzer crate
to live-process the currently playing audio and display the frequency spectrum
on the keyboard. The lower frequencies are on the left and the higher ones on
the right. The louder the music in general, the faster the hue cycle moves.
This took some time to get right, as there are several things to consider. For example, there are generally more lower frequencies in my audio than higher ones, so the right side's lights were noticeably less lit up. The easy but very effective solution was to double the brightness of the higher frequencies.
Here's the source code:
analyzer.rs.
Color cycle§
Moves through the rainbow pattern at a constant rate.

That's everything for this post§
Here's the direct link to the entire source repo.
Any questions? Possible improvements? What didn't you like? Let me know.
Until next time! 👋